Your account
Three small pages hold everything personal to you in Aegis: your profile, how you sign in — password, one-time codes, passkeys — and the AI notices you have acknowledged. This chapter walks all three, in plain words.
Everything else in Aegis is shared with your colleagues; these pages are yours alone. Each person sees and changes only their own settings here — an administrator cannot open your security or privacy pages, and you cannot browse anyone else's. Administrators do see the job title and phone number on your profile, and can correct your name and job title from Settings.
Who uses it
Everyone, whatever their role: Viewer, Contributor, Manager and Admin all get exactly the same pages, covering their own account only.
How to get there
There is no entry for these pages in the left menu. Select your name or avatar
at the right of the top bar to open
Profile (/account/profile). You reach the other two in
one of three ways: through the blue banner on the
Dashboard that invites you to
Set up MFA; by Aegis sending you there itself, when your
organisation requires a second factor for your role and you have not enrolled
one yet; or by typing the address — /account/security for sign-in
security, /account/privacy for the AI notices. Bookmark them once
you have been.
The profile page: your name and contact details
The Profile page holds how your name and contact details appear in
Aegis. Your Email is shown greyed out: it is your sign-in identity
and cannot be changed here.
-
Select your name or avatar in the top bar. The
Profilepage opens withDisplay name,Job titleandPhone number. -
Change what you need. The display name is required and can be up to 255
characters, the job title up to 100, and the phone number up to 32, using
digits, spaces and
+ ( ) - .. Clear the job title or phone number to remove it. -
Select
Save.Profile savedconfirms the change.
The note under the fields says it plainly: your job title and phone number are visible only to you and to administrators, never in user lists.
If you sign in with single sign-on, or your account was created by the
directory connector, your organisation's identity provider owns your name.
The field is read-only with the hint
Managed by your organisation's directory, and each single
sign-on takes the name from the provider again, so ask your IT team to
change it there. Job title and phone number stay yours to edit.
The security page: your second factor
A password alone can be guessed or stolen. A
second factor (an extra proof of identity on
top of your password, such as a code from your phone) means a stolen password is
not enough to get in. The Account security page shows two cards —
one for each kind of second factor Aegis supports — each stating plainly whether
it is on.
-
The
Authenticator app (TOTP)card covers 6-digit codes. TOTP (a time-based one-time password — a code that changes every 30 seconds in an app such as Microsoft Authenticator or Google Authenticator) is the most widely supported option. If you have not enrolled, the card offersSet up TOTP; once enrolled it shows anEnabledbadge, the date it was switched on, and a control to disable it. -
The
Passkeyscard covers signing in with the fingerprint, face or PIN you already use to unlock your device — no code to type. When passkeys are switched on for your workspace the card offersAdd a passkeyand lists each one you have enrolled with its device type and date. When they are not, the card saysPasskey sign-in isn't available on this tenant yet.and shows anUnavailablebadge instead of a button that would lead nowhere. - Enrolment for either happens on its own page. For TOTP you confirm your password, scan a square code with your authenticator app, and type the 6-digit code it shows to prove the link works. For a passkey you follow your device's own prompt — the same gesture you use to unlock it — and can give the passkey a nickname such as "MacBook Touch ID".
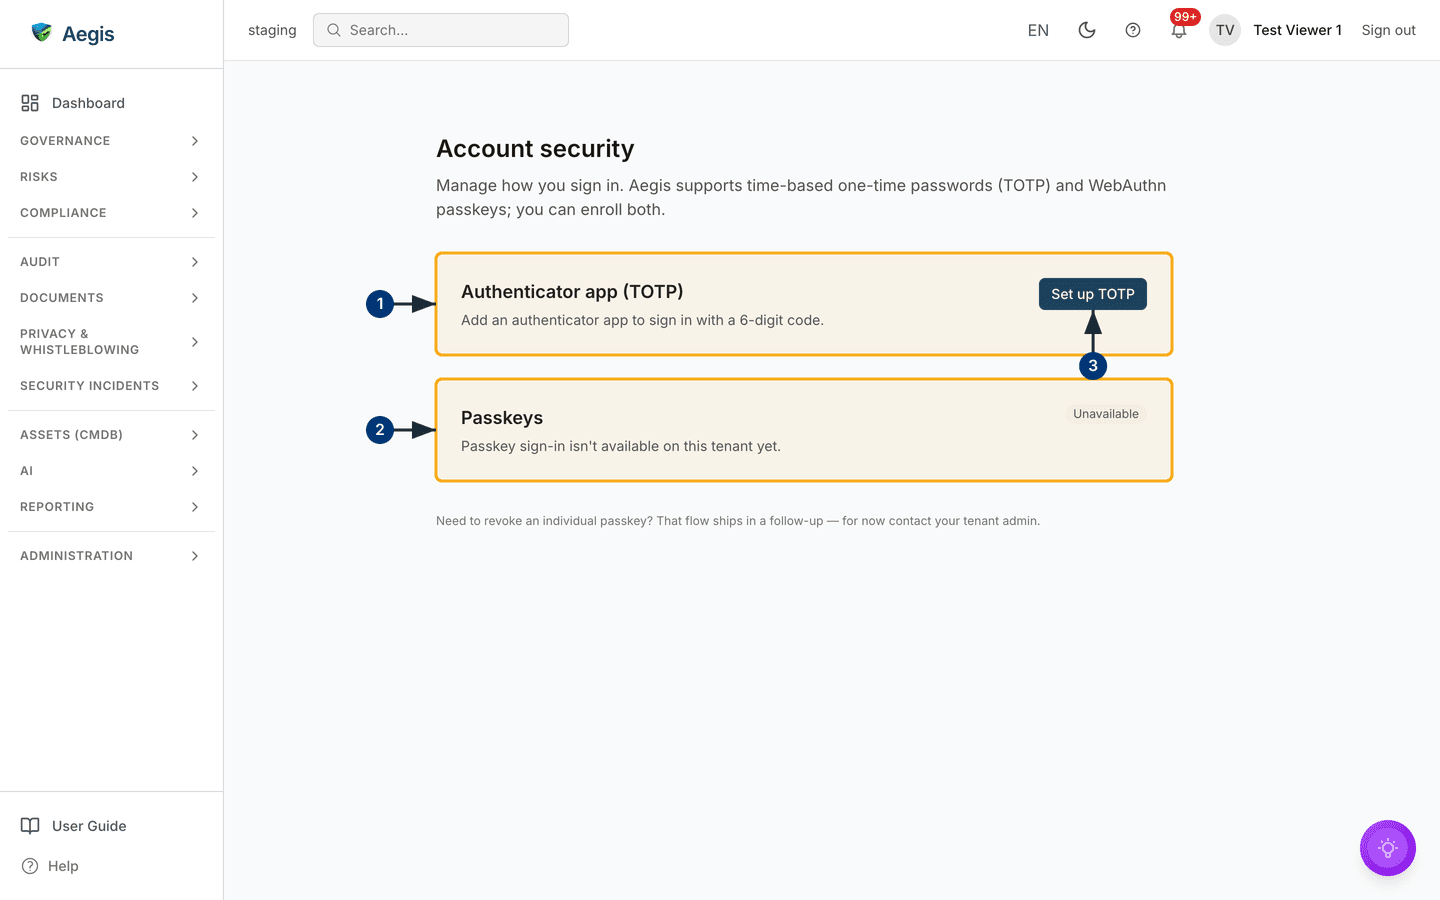
A passkey is tied to one device; an authenticator app follows your phone. Having both means losing one device does not lock you out. The second-factor check applies when you sign in with email and password — single sign-on through your organisation's identity provider carries that provider's own protections instead.
Turning two-factor off
-
With TOTP enabled, the card gains a
Disable two-factor authenticationcontrol. Select it and a confirmation section unfolds, explaining you will sign in with your password alone until you set it up again. -
Re-enter your current password — this proves it is really you at the
keyboard — and confirm with
Disable two-factor. A wrong password leaves two-factor exactly as it was.
Individual passkeys cannot yet be revoked from this page — a note at the foot says so and the flow ships in a follow-up. If a device with a passkey is lost, tell your administrator.
Your password
There is no password box on the security page. To change your password, sign out
and use
Forgot password? on the sign-in screen — a reset link arrives by
email — or ask an administrator, who can send a reset from
Settings. If you sign in through your organisation's
own system (single sign-on), your password lives there, not in Aegis. There is
also no page listing your open sessions; Sign out in the top bar
ends the one you are in.
The privacy page: your AI acknowledgements
The first time you use an AI feature in Aegis, a
transparency notice (a short statement of
what the AI feature does with your data, shown before you first use it) asks for
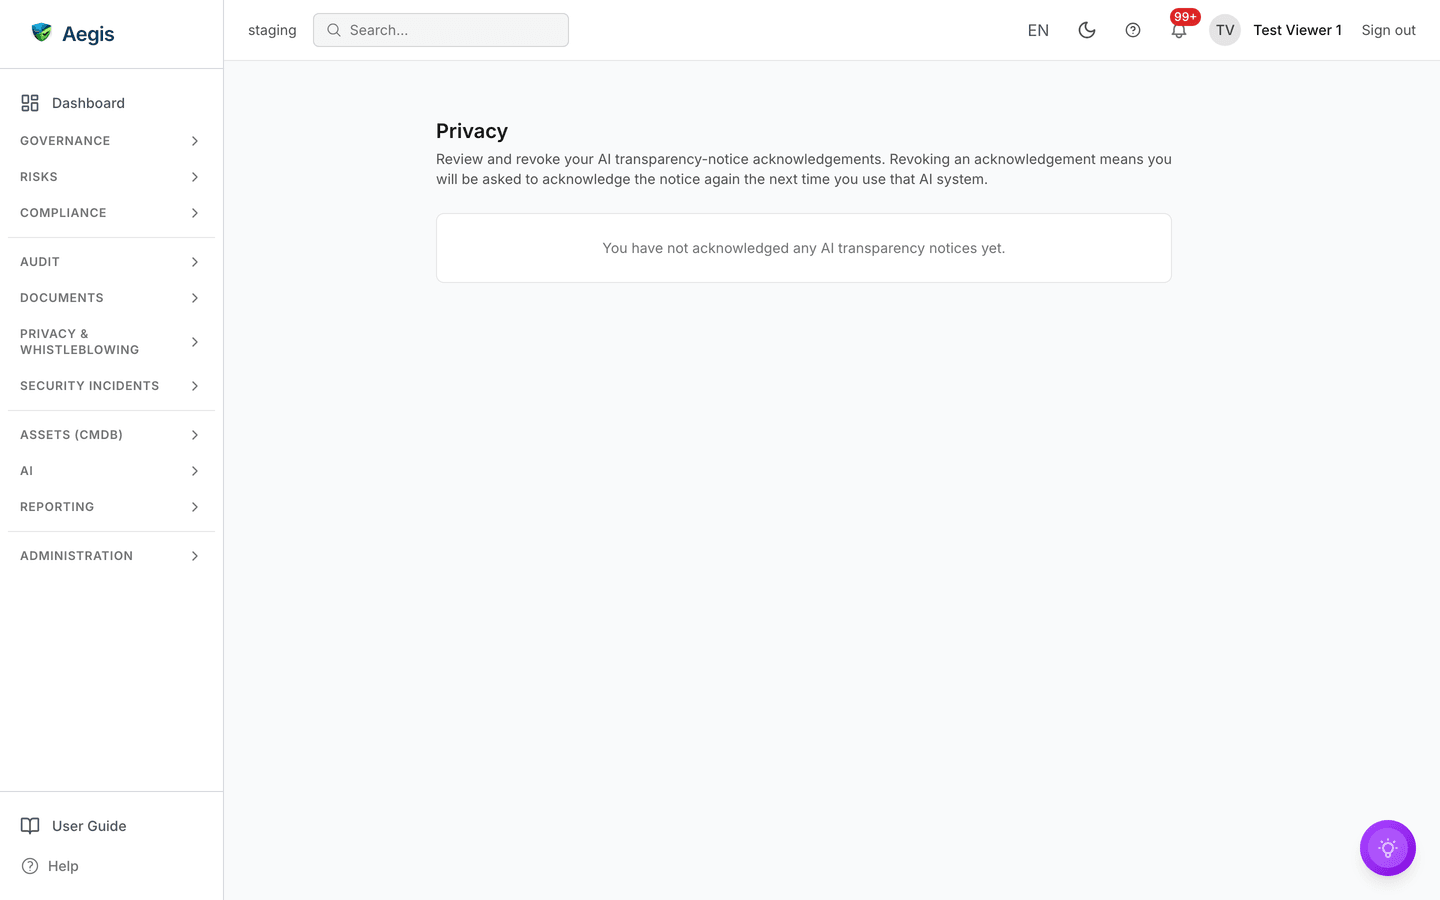
your acknowledgement. The Privacy page is the record of those
acknowledgements — one row per notice, with the version you accepted and when.
-
Open
/account/privacy. Each row names the AI system, the notice version you acknowledged, and the date. If a notice has moved on since, the row says the acknowledged version is superseded. -
Select
Revokeon a row to withdraw an acknowledgement. Nothing is switched off — the next time you use that AI feature, the notice is shown again and asks afresh. If you have never used an AI feature, the page says so:You have not acknowledged any AI transparency notices yet.
Tips and limits
-
You edit your own name, job title and phone number on
Profile; your email and role are managed by an administrator under Settings, and your role decides what the rest of Aegis shows you (see What each role can do). - If codes from your authenticator app are rejected, check the phone's clock — TOTP codes depend on the time being right. If the phone itself is gone, an administrator can help you regain access.
- Revoking an AI acknowledgement is about consent bookkeeping, not a switch: AI features stay available to your role, and the notice reappears on next use.
Where this connects
- Signing in — the sign-in flow itself, including what the second-factor challenge looks like.
- AI Dashboard — where the AI features behind those transparency notices live.
- Settings — the administrator's side: users, roles and single sign-on.